How Can We Help?
Vistapoint Quick Start Guide
Welcome to Vistapoint! Once your system administrator has added you as a user to their instance, follow these steps to get started quickly in Vistapoint.
Login
- Open the invitation email from Vistapoint sent to you with your login link. Check your spam or junk folders if you have trouble finding the email.
- Click the link in the email to open the web app.
- Login in with your username and password or create an account.
- On the Workspaces page, if there is not a workspace already shown, click Create to create a workspace.
Install the desktop app
- In the web app on the top menu select Apps > Vistapoint Desktop. The download will begin.
- Copy your connection URL from the dialog box.
- Double click to open the installation file VistapointSetup[version].msi and continue through the prompts.
IMPORTANT: Do not change the default installation location. This could cause issues with the default settings in any Add-ins. - Open Vistapoint.
- Enter the connection URL. Additional details for the connection URL can be shown by clicking options.
- Click Ok.
- Login with your username and password.
Set up your local work area
- On the desktop app, click on the MyWork tab.
- Select a Workspace you wish to work on. Click Update Workspace (top left). This will download a local copy of folders and files in the workspace to your C:\VistapointLocal\ folder.
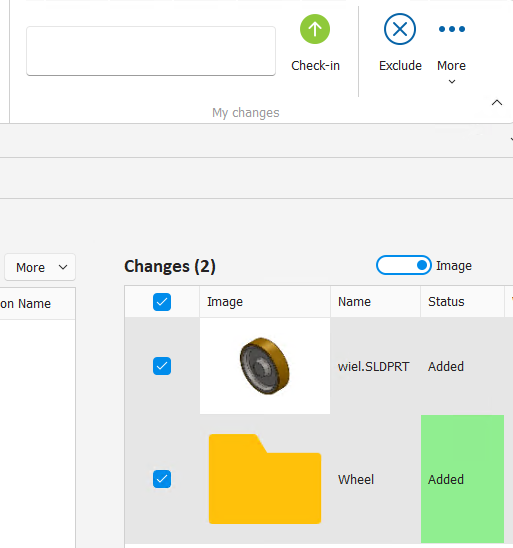
- Copy files you wish to import to your local workspace area C:\VistapointLocal\Workspace Name\Folder. These changes will appear in the changes area of the MyWork tab. Be sure to contain any references within the VistapointLocal folder so that references are connected in Vistapoint.
IMPORTANT: To analyze the CAD file references and metadata, you need to have the applicable CAD software installed. - Select the changes in your MyWork area and click Check in to upload the files to Vistapoint.
- Go to the Vistapoint web app and click refresh to view the imported files in Vistapoint.
Configure the web app
The web app can be configured to route actions directly on the desktop. For example, you can open or check-out documents and they will download and open directly on your desktop.
- Click the Open from browser icon on the right of the web app to toggle the button to show Open on desktop. Now you can call functions directly to the desktop app.

- Select a document and click Open.

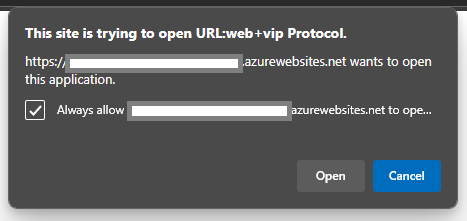
- You can select the check box to always allow calls from Vistapoint. Click Ok. The document will then open directly on your local computer and be saved under C:\VistapointLocal\…
Edit a document
- To make a change to a file, click on Edit > Check-out + Open.
- This will open your file. Once you make a change to a file and save, it will show in your MyWork tab on the desktop app. To discard the check out and unlock it in Vistapoint, click on Edit > Discard.
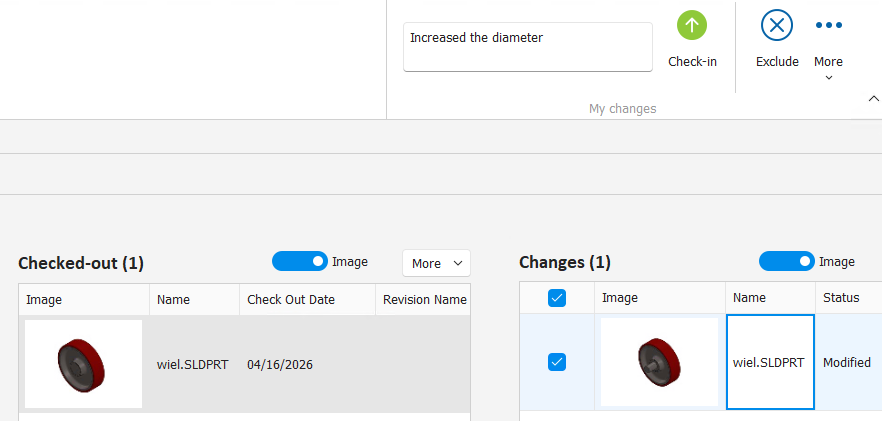
- When you are done with your changes, navigate to the MyWork tab.
- Select the changes to check in (if not selected already).
- Add a comment about what you changed.
- Click Check-in.