Getting Started CAD Manager Admin
Overview
This article describes the configuration and administration of CAD Manager.
Please Note: Some screenshots might look different depending on your DMS.
Settings locations
CAD Manager stores its settings in two settings files:
- Server Settings – The server settings file is the primary source for all CAD Manager settings. This file is created and maintained by administrators. The server configuration file is retrieved as part of a server package and is administered by OCM Service. Individual CAD users will have a copy of the server configuration file in their package cache. When an Admin makes changes to the CAD Manager environment, the latest server configuration file is automatically downloaded with the server package.
- Local Settings – The CAD user maintains the local settings file. This file contains a sub-set of the settings found in the server configuration file. Any custom settings that an individual CAD user might want for his system can be set using the local settings file. Settings in the local settings file takes precedence over the settings found in the server settings file. The two files combine to form the settings used locally by the CAD user.
Security
The Configuration application can place a limit on available functionality depending upon the current security settings. By default, all users are allowed full access to the Configuration application. If this is not desired, limits should be put in place by an administrator or consultant.
Operation Mode
The Configuration application has three modes of operation: normal user, administrator, and consultant. Each mode has different permissions when it comes to editing configuration files:
Normal User
Normal users may edit the local settings file, but not the server settings file. The server settings can still be viewed as read-only.
Administrator
Administrators may edit both the local and server settings files, as well as add settings, sections, and profiles.
Administrators also have full access to property definition editing, licensing, package reset, and OCM Service configuration.
Consultant
Consultants have the same privileges as an Administrator and they may load other settings files and property definition files, both from disk, as well as from any available CAD Manager packages.
Administrator Access
Configure who can edit server settings with the Administrator Access setting in Server Settings > System. This setting has three options:
Unrestricted
All users can edit server settings.
Windows Username
The Windows username is set for Administrators. The username includes the Domain name and is shown in the bottom left corner of the OCM Configuration window.
DMS Username
If the Configuration application is launched from Cad Manager, a CAD application, or from the DMS, the DMS username is checked for administrator privileges. The list of DMS administrators is located in the “Administrators” setting in the server settings file.
Mode Restrictions
The documentation will denote when certain functions are restricted to certain operational modes. If a function can only be performed in administrator or consultant mode, it will be denoted as:
Administrator/Consultant Mode Only
If a function can only be performed in consultant mode, it will be denoted as:
Consultant Mode Only
All other functions can be performed by any user.
Getting Started
Starting OCM Configuration
- Open the OCM Configuration application by:
Search in the windows search window for the application OCM Configuration.
OR
Right click the CAD Manager application in the bottom system tray icon and select Configuration.
2. CAD Manager Configuration should open.
Local Settings
Local settings are user specific settings that can be adjusted to connect to a certain package.
- CAD Manager Configuration local settings is formatted as follows:

Server Settings
Adjust server settings to provide settings for all users using the server package.
Server settings are formatted as follows:
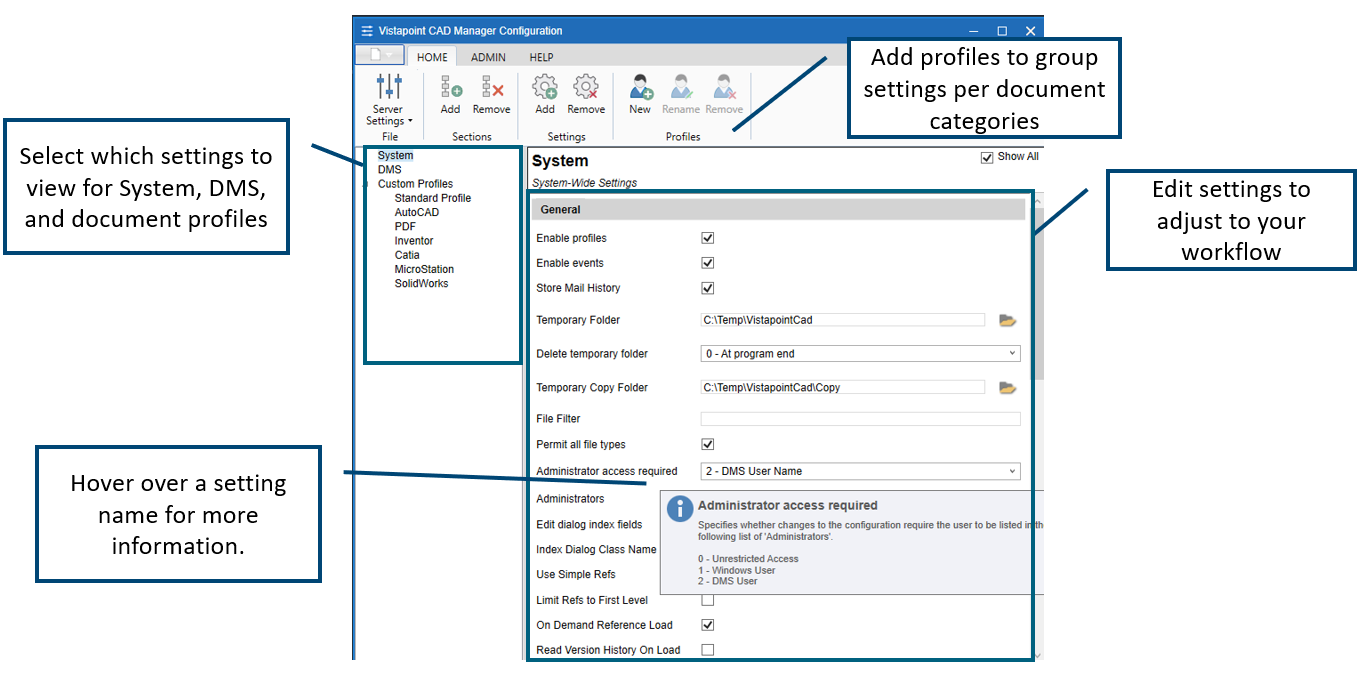
System
Adjust CAD Manager settings.
Sections:
- General: Adjust settings for allowing what users are allowed to access the OCM Configuration settings, temporary folder location, and more.
- User Interface: Adjust the user interface settings of CAD Manager including the size of thumbnails, what buttons to show, and what files to show.
- System Events: Add custom event scripts for customizing your workflow.
DMS
Adjust settings for the specific DMS.
Sections:
- General: Adjust the client program title and version names.
- Archiving: Adjust settings for what actions to perform during check-out and check-in.
- User Interface: Hide certain CAD buttons.
- Data Settings: Set group name and enable server cache.
Custom Profiles
Custom profiles are groups that you can use to categorize settings for your files. Create a profile, add which types of file type names belong to the profile, and adjust settings for those files. The Standard Profile is used if a file type is not included in another profile.
Sections:
- General: File type grouping settings, archive, import, and check-out settings.
- Events: Add custom events to adjust to your workflow.
- Attributes: Add attributes that map to index fields, adjust the information shown for the Version History tab, and adjust the information shown in the Where Used tab.
Saving
Save your work and make sure that settings are updated in the clients.
- Click the file icon on the top left.
- Choose a save option:
- Revert to Previous Save: Do not save changes.
- Save configuration locally: Save local settings.
- Save configuration globally: Save server settings.
- Exit Application: Once saved, you can exit the application. Otherwise you need to revert to previous save to discard changes.
- To update client applications to have the latest changes, Exit CAD Manager, and restart so that it initializes. In the bottom right corner, open the hidden icons system tray. Right click CAD Manager icon > Exit.