Getting Started with CAD Manager
Overview
CAD Manager is a software program for managing engineering drawings within a Document Management System (DMS). CAD Manager analyzes the drawing files of CAD systems and displays their structure. Meta-data from attributes and title blocks of the drawing are used as classification attributes and for automatic indexing.
Please Note: Some screenshots might look different depending on your DMS.
Getting Started
Start the DMS.
Open the application and login.
Activate a CAD function.
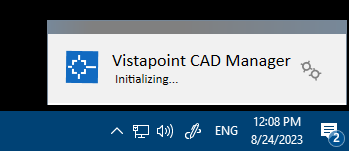
Select a CAD file and click on one of the CAD Manager buttons or click Import to start a CAD function. The CAD Manager dialog should start in the bottom right corner of the screen and say “Initializing”.
If the CAD Manager window does not appear, please check your connection or installation configuration.
View properties
- Select a CAD file and click CAD Properties.
CAD Manager is formatted as follows:
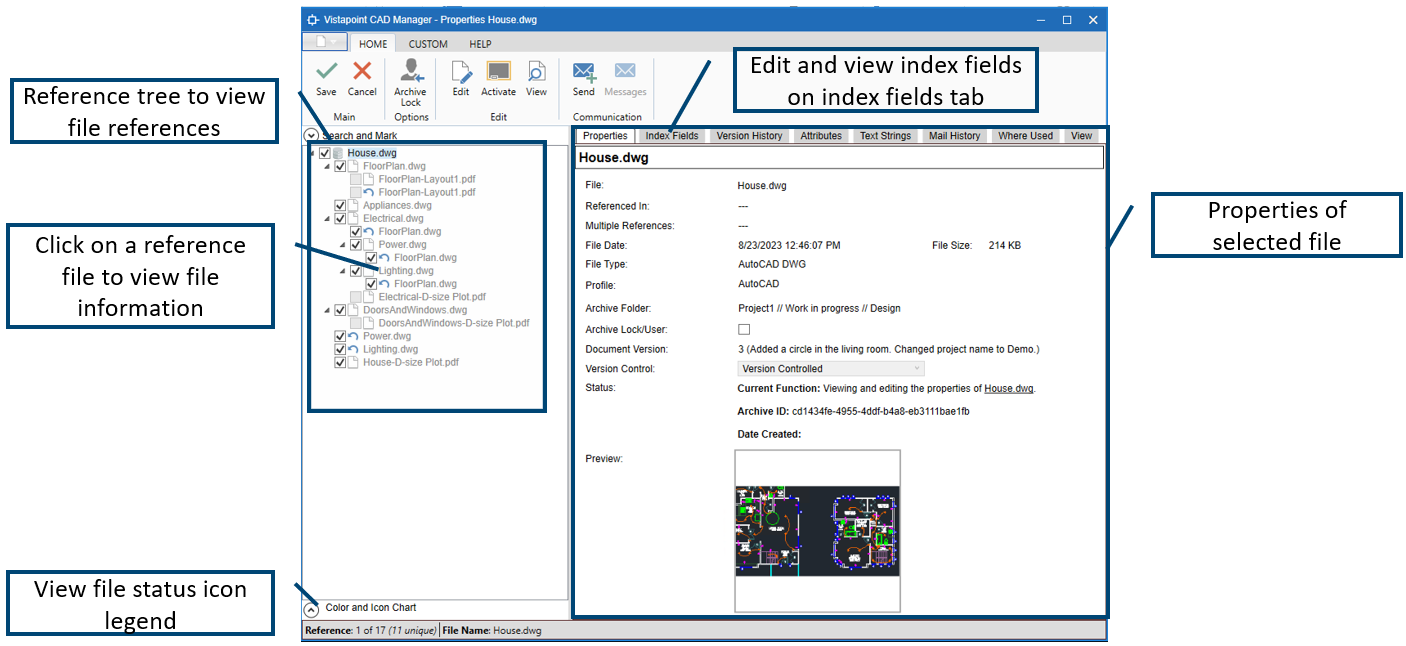
File information is shown on tabs including:
Properties
General file information and status.
Index Fields
Index fields or labels assigned to the document class.
Version History
Shows the version history and comments of the selected file.
Attributes
Attributes extracted from the CAD file.
Text Strings
Text strings extracted from the CAD file.
Mail History
Log of information about when a file was sent using the Send button in CAD Manager.
Where Used
Shows what main files included the selected file as a reference.
View
Integrated view of the file if an integrated view is included.
Import
Importing a file through CAD Manager allows you import file references and attributes.
-
- Click Import in the CAD Manager button area.
- Select a CAD file to import. For example, a CAD file with references. For most cases, a dialog box will ask that you open the file in the CAD software and import from there. This allows you to read the CAD file attributes and file references. If it asks you to continue the import from your CAD software, click Import in the tab in your CAD software.
- (Optional) Perform actions before import.
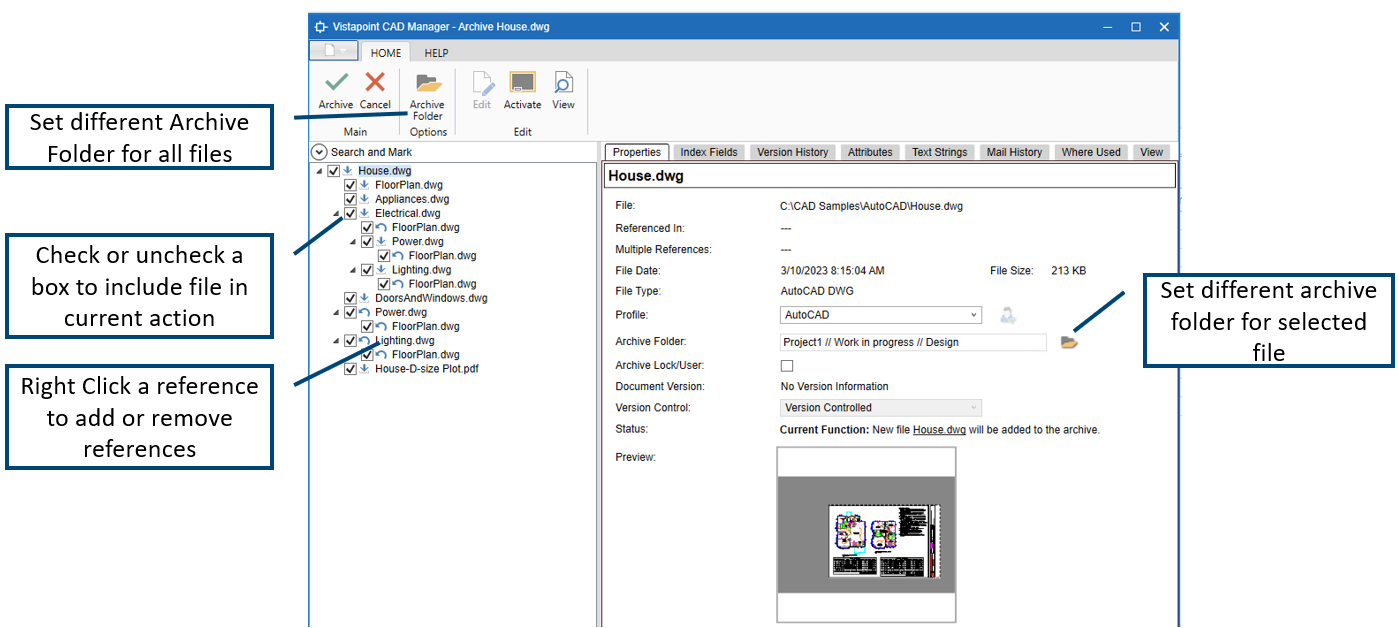
4. Click Archive to continue.
Check-out
To make an edit to a file, select check out.
- Select a CAD file and click Check-out.
- (Optional) Perform actions on references before check-out.
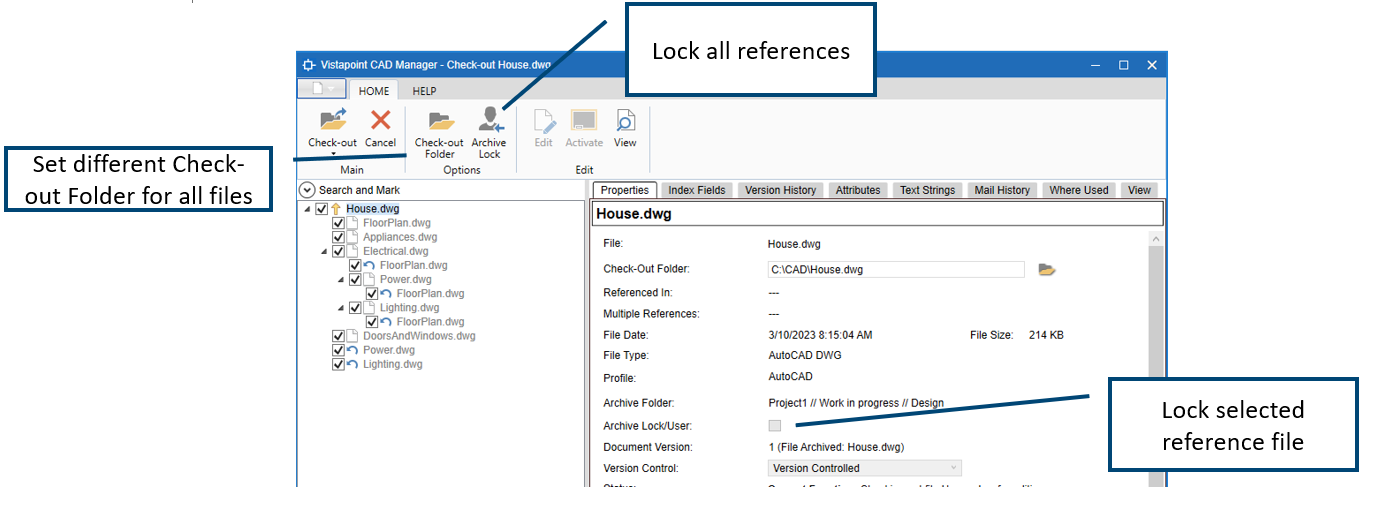
3. Click Check-out.
Check-in
When you are done editing your CAD file, check it in to save it as a new version.
- Click Check-in.
- (Optional) Perform actions and view status or references.
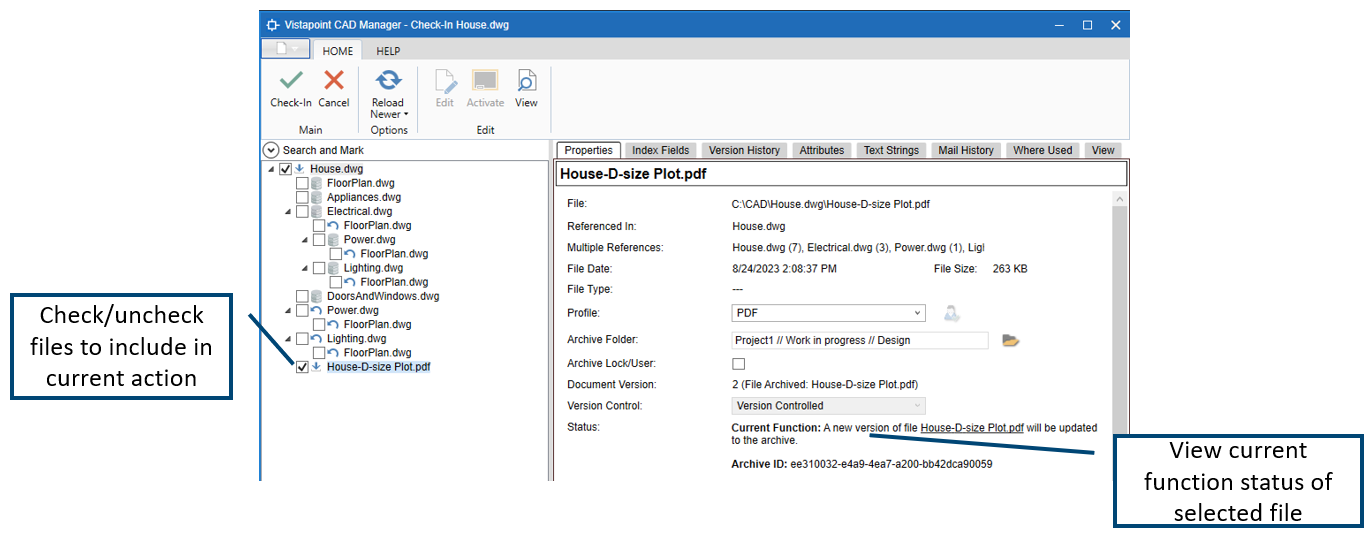
3. Click Check-in.
4. Add a version comment and version name.
5. Choose:
Ok – Add a different version comment for imported references.
OR
Ok to All – Add the same version comment for all files.
Copy
To copy a file and references or to create a new revision, click copy.
- Select a CAD file and click Copy.
- In the reference tree, check the box for the files you want to copy.
- Choose:
Yes – Default name ends with revision letter.
OR
No – Default name is the same.
4. Enter a name for the copy.
5. Click Ok.
6. Repeat for files in the reference tree you want to copy as well.
7. Click Copy when done.
If you renamed file references when copying, you need to also check out the file main file and rename the file references and re-reference them in the CAD Application. Otherwise, file references will be lost when you open the main file.
More functions
View
View a file as Read-only.
Discard
Discard a file if you check out a file and don’t want to check in the changes you made.
Delete
Delete a file from the archive.
Export
Export a file and any references.
Send
Automatically attach the main file and any references as a zip folder to an Email.